
How to Rent a Dumpster for Your Home Renovation
Introduction
Renovating your home brings fresh possibilities—open spaces, updated floors, modern bathrooms—but let’s not sugarcoat it: the mess is real. From heaps of demo debris to packaging from all those new fixtures, managing waste can quickly spiral out of control without a plan.
Renting a dumpster is the unsung hero of home renovations. It’s like having a giant waste basket on-site, seamlessly containing the chaos and keeping your project running without unnecessary interruptions. It makes cleanup wholly manageable and ensures all that debris is dealt with responsibly.
This guide walks you through everything you need to know about renting a dumpster—because a renovation done right doesn’t just look pretty, it’s clean, efficient, and waste-free.
1. Why Renting a Dumpster is Essential for Home Renovations
Home renovations might start with dreams of stylish tiles or a Pinterest-worthy kitchen island, but they inevitably come with something else: debris—and lots of it. Walls get torn down, floors come up, old fixtures are trashed, and before you know it, you’re staring at a mountain of waste that won’t fit neatly into a couple of trash bags.
Here’s why renting a dumpster is a game-changer:
- Volume of debris: From drywall to broken tile and scraps of wood, the sheer weight and bulk of renovation trash can overwhelm regular curbside pickup services. Dumpsters handle it all—no extra trips, no overfilling garbage bins.
- A dedicated solution: Instead of searching for places to stash trash or coordinating inconvenient pickups, a dumpster offers one reliable destination for all your waste.
- Staying compliant: Certain materials, like old insulation, treated wood, or leftover paint, have specific disposal requirements. Renting the right dumpster ensures you adhere to legal and environmental guidelines for safe, responsible waste management.
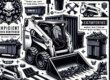
2. Different Types of Dumpsters for Renovation Projects
Not all dumpsters are one-size-fits-all. Your home renovation might call for a compact dumpster to clear out your attic—or a larger roll-off dumpster to handle a full-blown kitchen remodel. Knowing what’s available will help you pick the right fit.
- Roll-off dumpsters: The gold standard for renovations, these rectangular, open-top dumpsters are ideal for large-scale projects involving lots of heavy debris. They’re delivered and rolled off a truck to your site for maximum convenience.
- Small dumpsters: For minor projects, like revamping a half-bath, smaller models provide just enough capacity without hogging driveway space.
- Specialized dumpsters: Got recyclables or hazardous materials like old paint or asbestos to toss? Opt for specialty dumpsters designed for safe handling of these waste types.
Pro Tip: Choosing the Right Size
Think bigger than you think. Underestimating the size of your dumpster is a common mistake that can lead to extra costs and unnecessary stress. For smaller projects, a 10-yard dumpster typically suffices. For extensive overhauls, like adding an extra room, a 20–30 yard roll-off option is safer. It’s always better to have extra space than run out mid-renovation.
3. Steps to Rent a Dumpster for Your Renovation
3.1. Assess Your Project Needs
The first step to renting a dumpster is understanding exactly what you’ll be tossing.
- Estimate the type and amount of waste: Will you mostly have drywall and shingles, or are there heavy construction materials like bricks? This affects both the size and weight capacity you’ll need.
- Identify restricted items: Many materials—like electronics, batteries, or hazardous chemicals—may require special disposal. Clarify what’s allowed before booking.
3.2. Research Dumpster Rental Companies
Not all dumpster rental companies are created equal. Comparing options ensures you get the best deal without sacrificing quality and service.
- Consider pricing, reviews, and whether they offer delivery and pickup services.
- Check if they’re local to your area—dumpsters located conveniently near California towns like Alameda or Oakland are likely to deliver quickly and cost less.
3.3. Understand Rental Terms and Policies
This is where you’ll want to avoid getting blindsided by hidden fees or issues.
- Rental duration: Most companies offer rentals for 7–14 days, but if your renovation takes longer, ask about extension fees.
- Weight limits: Dumpsters can only handle so much weight before additional penalties kick in. Check for weight caps and possible overage charges.
- Permits: If the dumpster will sit on public property (a street or sidewalk), some cities—like Downtown Oakland—might require permits. Research your local municipality’s policies to avoid fines.
3.4. Book the Dumpster
With your size, company, and rental terms decided, it’s time to book.
- Reserve early to ensure availability, especially if it’s renovation season in your area.
- Align the dumpster delivery date with the start of demolition to maximize its usefulness.
4. Tips for Using a Dumpster Effectively
Getting the right dumpster to your driveway is only half the battle—using it efficiently is just as important.
- Plan your loading strategy: Don’t just toss in waste randomly. Break down bulky items (like cabinets or dressers) to save space and load heavy debris, like bricks or tiles, at the bottom to stabilize the weight.
- Mind the rules: Avoid prohibited items and follow proper disposal guidelines to minimize extra fees or complications.
- Keep it accessible: Place the dumpster where loading is safe and convenient, but not blocking driveways, sidewalks, or utility lines.
- Track fill levels: Overfilling dumpsters often results in surcharges or safety issues during transport. Keep waste below the “fill line” marked on the container.
5. Common Challenges and How to Avoid Them
Even with a solid plan, dumpster rentals come with their own learning curves. Here’s how to sidestep common pitfalls:
- Underestimating size: Think a 10-yard dumpster is plenty only to realize it’s not? Avoid this by overestimating your project scope. It’s better to have leftover space than scramble for a second dumpster.
- Last-minute bookings: High-demand seasons (spring and summer) can make finding a dumpster tricky. Book well in advance to avoid delays.
- Improper placement: Planning to park the dumpster on your driveway? Consider its size and weight to avoid cracking concrete—and make sure there’s enough clearance for delivery.
- Surprise fees: Dumpster rentals have weight caps, duration limits, and restrictions on certain waste types. Clarify these details up front to budget effectively and avoid charged surprises.
Conclusion
Managing renovation waste doesn’t have to be overwhelming. By renting the right dumpster and planning ahead, you can create a streamlined process that leaves your space clean, your timeline intact, and your stress at an all-time low. Pick a size, schedule delivery, and stay communicative with your rental company for the easiest process possible.
A cleaner, debris-free renovation not only looks more polished but ensures a smoother, safer renovation experience. And remember—proper waste management isn’t just practical; it’s essential for the environment and your neighborhood.
Need help with disposal, hauling, or dumpster rental? Get a free quote from Sons of Odin Hauling today!