
How to Rent a Dumpster for Your Home Renovation
Home renovations are a great way to breathe new life into your living space, but they come with a lot of debris. Whether you’re giving your bathroom a facelift or tearing down walls for an open-concept remodel, dealing with the resulting waste is a crucial part of the process. That’s where renting a dumpster comes in—it keeps your project organized, safe, and environmentally mindful.
Let’s walk through the essentials of renting a dumpster, step by step, so you can manage your renovation waste like a pro.
Why Waste Management Is Key
Renovations create waste—lots of it. Think drywall scraps, broken tiles, wood remnants, and outdated fixtures. A clear approach to handling this debris is non-negotiable for several reasons:
- Staying on Track: A clutter-free worksite helps you or your contractors focus on the work at hand without unnecessary delays.
- Safety First: Loose piles of debris can hide sharp edges or create tripping hazards. A dumpster keeps the workspace safe and organized.
- Avoiding Fines: Most municipalities enforce rules about waste disposal. Renting a dumpster helps you comply with local regulations and steer clear of penalties.
- Eco-Friendly Options: Many reputable dumpster providers emphasize recycling and proper disposal methods, so you can minimize your environmental footprint.
Ignoring waste management can lead to costly setbacks and unnecessary risks. Planning ahead ensures your project runs smoothly from start to finish.
Step 1: Assessing Your Needs
What’s Your Project Scope?
The scale of your renovation will dictate the type and volume of waste you’ll need to handle. For example:
- A bathroom remodel generates old tiles, drywall scraps, and outdated appliances.
- A roof replacement means you’ll have shingles and possibly wood waste.
- Concrete work or landscaping projects create heavy, dense materials requiring special disposal.
Estimate the Volume of Waste
Calculating waste correctly ensures you choose a dumpster that fits your needs. Here’s a quick guide to match project sizes with dumpster sizes:
- Small projects (e.g., minor cleanouts or cabinet removal): 10-yard dumpster
- Medium projects (e.g., kitchen or multiple-room remodels): 20-yard dumpster
- Large undertakings (e.g., full-home renovations): 30- to 40-yard dumpster
Explore Alternatives
Depending on your situation, other waste removal methods could work better:
- Junk Hauling Services: Perfect for removing bulky items like furniture or appliances.
- Waste Disposal Centers: A practical option if you have minimal debris and are located near a landfill or recycling facility.
Step 2: Select the Right Dumpster Size
Picking the right size for your dumpster won’t just prevent frustrating overflows—it’ll also save you money by avoiding the need for additional rentals. Here’s a quick breakdown:
Dumpster Size Cheat Sheet:
- 10-Yard Dumpster: Ideal for small projects like minor remodels or landscaping debris. Holds roughly 3 pickup truck loads.
- 20-Yard Dumpster: The go-to for mid-sized renovations, such as kitchens or small additions. Holds about 6 pickup truck loads.
- 30-Yard Dumpster: Best for large home remodels, roofing, or major cleanouts. Fits around 9 pickup truck loads.
- 40-Yard Dumpster: Suited for demolition projects or full-scale construction jobs. Equivalent to 12 or more pickup truck loads.
Points to Consider:
- Err on the Side of Larger: It’s cheaper and less hassle to have extra space than to run out halfway through the job.
- Check Placement Space: Make sure you have room for the dumpster where you plan to place it. Measure if needed.
- Permits Might Be Required: If the dumpster will be on public property (like a street), you may need to apply for a permit.
Step 3: Renting the Dumpster
Here’s a no-fuss guide to renting your dumpster:
- Research Providers: Look for local companies with solid reviews, transparent pricing, and proper licensing.
- Share Project Details: Be ready to explain the type and amount of waste you’ll generate so they can recommend the right size.
- Choose a Rental Period: Most rentals span a few days to a week. Need more time? Many companies offer extensions.
- Plan Delivery and Placement: Pick a delivery date and ensure a clear, accessible area for the dumpster.
- Know What’s Prohibited: Double-check what can’t go in the dumpster (e.g., electronics, hazardous chemicals, or tires).
- Schedule Pickup: Once you’re done, call the provider to arrange prompt removal.
Step 4: Make the Most of Your Dumpster
Loading Efficiency
- Break It Down: Disassemble furniture, flatten boxes, and break apart large items to maximize space.
- Heavy Stuff Goes First: Place dense materials like concrete or bricks at the bottom to keep the load balanced.
- Spread the Weight: Load evenly to prevent tipping issues during transport.
Avoid Overcharges
Dumpsters have both size and weight limits, so overloading can lead to extra fees—or worse, a truck that can’t haul it away. Stay within the limits to keep things smooth.
Step 5: Add-On Services to Consider
Junk Removal
If you’ve got items a dumpster won’t handle—like oversized furniture, appliances, or restricted materials—junk hauling services can step in. Some companies offer one-time pickups for these harder-to-dispose-of items.
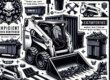
Equipment Rentals
If your project involves heavy debris like concrete or stones, tools like skid steers can make cleanup faster and safer. Some dumpster providers offer package deals that include equipment rental.
Step 6: Go Green
Keep Sustainability in Mind
Many dumpster companies prioritize eco-friendly disposal, sorting out recyclables like metal, wood, and plastic to reduce landfill waste.
What You Can Do:
- Donate Salvageable Materials: Old fixtures or usable furniture could find a second life with a local charity.
- Separate Your Waste: Pull out recyclables to cut down on overall trash volume.
- Dispose of Hazardous Items Properly: Batteries, paints, or chemicals need specialized handling—reach out to local facilities for guidance.
Final Thoughts
Renting a dumpster takes the hassle out of renovation cleanup. It keeps your workspace safer, ensures legal compliance, and lets you focus on the actual project without worrying about the mess.
Follow this guide to assess your needs, pick the right size, and streamline the rental process. With the right waste management plan in place, you’ll save time, money, and headaches.
Think less about the cleanup and more about the transformation ahead. You’ve got this!
Need help with disposal, hauling, or dumpster rental? Get a free quote from Sons of Odin Hauling today!